Cómo hacer un drone con Arduino, ahora más fácil con este tutorial
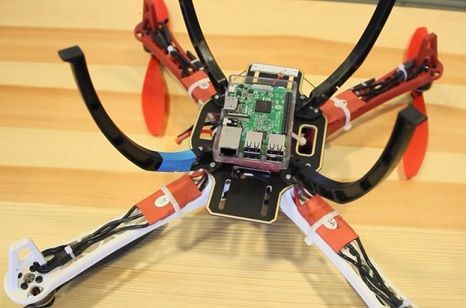
Montar un drone con Arduino
Uno de los proyectos más populares en los que piensa hacer alguien con Arduino es el de montar un drone o Quadcopter. Bien pues ahora es más sencillo de realizar gracias al controlador de vuelo YMFC-V2 3D, el cual permite hacerlo más fácilmente a quien quiera crear su propio drone con una placa Arduino Uno.
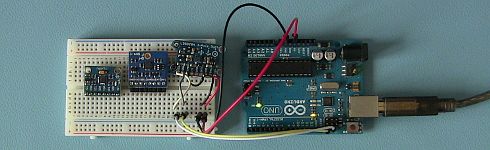
Su creador es Joop Brokking y en el siguiente vídeo nos explica en qué consiste y en cómo instalarlo para montar un drone con Arduino Uno. El proceso que nos explica en el vídeo se puede dividir en 3 partes. La primera en la que el programa de instalación se carga en el Arduino y en el que el usuario puede configurar el giroscopio y el transmisor. El segundo sería un programa a parte que se emplea para ayudar al usuario a calibrar los controladores electrónicos de velocidad. Y en tercer lugar se carga el programa con el que ya puedes probar y volar el drone.
Joop nos deja este código de ejemplo en su web trabajando con la EEPROM
===================================================
Blinking LED
===================================================
9 8 7 6 5 4 3 2 1

===================================================
Transmitter setup
===================================================
Checking for valid receiver signals...
OK

Place all sticks and subtrims in the center position within 10 seconds.
9 8 7 6 5 4 3 2 1
Center positions stored.
Digital input 08 = 1504
Digital input 09 = 1504
Digital input 10 = 1504
Digital input 11 = 1504


Move the throttle stick to full throttle and back to center
Throttle is connected to digital input 9
Channel inverted = no

Move the pitch stick to simulate nose up and back to center
Pitch is connected to digital input 10
Channel inverted = no

Move the roll stick to simulate left wing up and back to center
roll is connected to digital input 7
Channel inverted = no

Move the yaw stick to simulate nose right and back to center
Yaw is connected to digital input 8
Channel inverted = no

Gently move all the sticks simultaneously to their extends
When ready put the sticks back in their center positions
Measuring endpoints....

Channel values found during setup
Channel 1 values:1004 - 1504 - 2004
Channel 2 values:1004 - 1504 - 2004
Channel 3 values:1004 - 1504 - 2004
Channel 4 values:1000 - 1504 - 2008

===================================================
Gyro search
===================================================
Searching for MPU-6050 on address 0x68/104
Searching for MPU-6050 on address 0x69/105
Searching for L3G4200D on address 0x68/104
Searching for L3G4200D on address 0x69/105
Searching for L3GD20H on address 0x6A/106
L3GD20H found on address 0x6A

===================================================
Gyro register settings
===================================================
Register 0x20 is set to:1111
Register 0x23 is set to:10010000

===================================================
Gyro calibration
===================================================
Don't move the quadcopter!! Calibration starts in 3 seconds
Calibrating the gyro, This will take +/- 8 seconds
Please wait....................
Axis 1 offset=-73.08
Axis 2 offset=178.98
Axis 3 offset=-97.04

===================================================
Gyro axes configuration
===================================================
Lift the left side of the quadcopter to a 45 degree angle within 10 seconds
OK!
Angle detection = 2
Axis inverted = no
Put the quadcopter back in its original position within 10 seconds
9 8 7 6 5 4 3 2 1

Lift the nose of the quadcopter to a 45 degree angle within 10 seconds
OK!
Angle detection = 1
Axis inverted = no
Put the quadcopter back in its original position within 10 seconds
9 8 7 6 5 4 3 2 1

Rotate the nose of the quadcopter 45 degree to the right within 10 seconds
OK!
Angle detection = 3
Axis inverted = yes

===================================================
Storing EEPROM information
===================================================
Writing EEPROM
Done!
Verify EEPROM data
Verification done

Setup is finished.
You can now upload the YMFC-3D V2 code.
Si tienes interés en el programa y en versiones anteriores del mismo aquí tienes el enlace a la web de Joop Brokking, en ella nos explica todos los pasos y experimentos que ha dado para el desarrollo de este sistema. Y aquí te dejamos un enlace a 5 plataformas basadas en Arduino para construir un Quadcopter.
[amazon box=»B01MXGST4I» ]